Many times we need to check which application is using more internet (also called as network) data bandwidth on your computer. Windows 10 provides great logging and visualization for network data use by applications, which you can use to find applications using more network bandwidth on your computer. Follow below quick steps to see internet data usage metrics by applications on your computer.
- Open Windows 10 "Settings App" by clicking Settings in start menu or by typing Settings in Windows Search box and selecting "Settings".
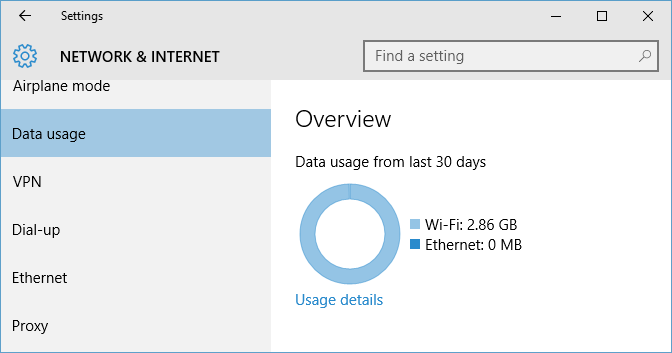
- Click on "Network & Internet" in Settings App.
- Select "Data usage" in left pane in "NETWORK & INTERNET" Settings screen.
In right pane, you can now see overview of network data usage on your computer in last 30 days. This will also show data usage on Wi-Fi connection as well as on Ethernet (LAN) connection.
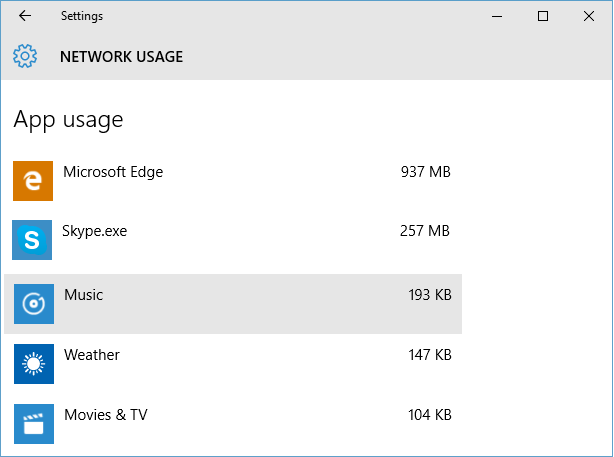
- Click on "Usage details" link to see amount of network data used by each of the application on your computer in decreasing order of data usage.
App usage view will help you identify applications using most of internet or network data on your computer.
As I do lot of web browsing and Skype calls on my computer, you can see that Microsoft Edge and Skype applications are using most of internet bandwidth on my computer.